RV Renovation Summary
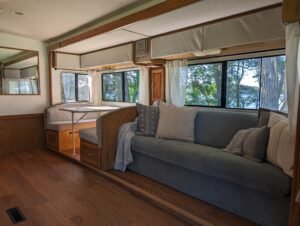
We recently took on the project of renovating our RV, and we are thrilled with the results! We completely transformed the interior by replacing and renovating carpet floors into hardwood, putting on a fresh coat of paint, updating the upholstery, revamping the bathroom, and adding new decorations. The new floor and paint really brightened up the space, and the updated upholstery gave it a modern and cozy feel. We also put a lot of thought into the bathroom, making it both functional and stylish. Lastly, we added some new decorations to personalize the space and make it feel more like home. Now our RV feels like a brand new space, and we can’t wait to hit the road and enjoy it!
Floor Renovation
The original flooring in our 97 Winnebago was this beautiful, rustic, 30 year old brown carpet… and it had to go. We started by ripping out the carpet which was put in with what seemed at least 500 staples. For such a small area we thought this would take maybe 30 minutes but it quickly turned into a few hours. One of the hardest parts was removing the carpet from underneath the slide out. But we were able to work around this by prying the slide out up slightly to remove the carpet.
After the carpet and staples were completely removed we installed a wood laminate floor. We chose this because of how quick and easy it is to install. We needed 180 sq ft to floor our 148 sq ft RV. We needed the extra flooring square footage because pieces get cut to fit in small areas and once a piece is cut, the remainder is usually trash. Also because laminate flooring comes in 20 sq ft boxes which lead to extra material at the end. The laminate pieces only snap together in one specific way and direction. Meaning when you cut off an edge, it cannot be connected to another piece properly, hence the extra square footage needed. The installation of this flooring took around 10 hours total including the trim pieces and narrow cuts.


Flooring Cost
The cost of the wood floor laminate was about $2 per square foot, meaning just the wood laminate panels were a total of $360. We also needed trim pieces around the stairs, slide out, and where the wood laminate meets the driving area and bedroom. Our all in cost to redo the floor was around $500 and didn’t take as long as we expected!
Painting and Backsplash
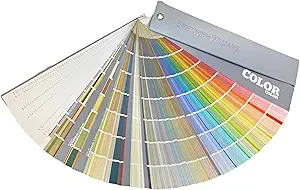
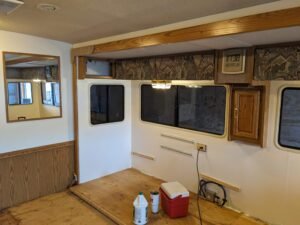
When we bout the RV it came with the original wall paper which was this cream with brown swirls on it. While it was vintage looking, the wall paper wasn’t really our style. We started with a run to Home Depot where we grabbed primer, paint, and all of the painting supplies needed. We chose an off white color to brighten the area. One thing we noticed upon first purchase of the RV is how dark the interior was. The white paint quickly brightened up this area. The painting also took longer than expected because of how many small areas and details there were to paint around. All together with primer and paint this process took about 8 hours and made a huge difference inside of the RV.
The backsplash is something we decided to add because we wanted more details than white walls. After browsing Google for a few days we decided to try stick on backsplash. We ordered this from Amazon which arrived just a day or two later. Basically, what we ordered was textured and detailed stickers looking like a tile backsplash. This product is recommended because it can bend and flex with the walls of an RV while driving when real tile and grout could crack or chip during driving on rough roads. This process was faster than painting and took about 3 hours to fully install. It makes our kitchen area look very clean and breaks up the white walls.


Painting and Backsplash Cost
The primer, paint, and backsplash alone were not too costly, but we needed the materials along with it. Our total cost for all material and tools was just under $250 total. We did splurge a little and bought the nicer paint brushes which was a game changer for going around windows, cabinets, and other small details. If you are going to be painting small areas, we strongly recommend spending the extra $5 per brush to get a higher quality.
Upholstery and Furniture Fabric
For some reason it seems all RVs made in the 90’s have this great camouflage pattern upholstery on all of the couches, booth cushions, and cabinet covers. This was true in our RV when we bought it and needed to be replaced as well. The overall process for doing this took the longest as there were multiple parts and different fabric used for each furniture piece. Altogether we reupholstered our couch that folds down into a bed, booth cushions, and the cabinet faces. We went to a couple different Joann’s Fabrics stores and managed to get fabric on sale which helped keep our cost so low for this process.
Cabinets
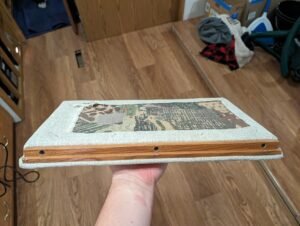
The cabinets were the easiest and most straightforward to tackle. We decided to use a textured gray pattern on these which is a similar color to the ceiling. We simply took off all of the cabinet doors, wrapped the fabric around the front, and stapled the fabric to the back of the cabinet door. This process took 2 hours to complete all of the cabinet doors.

Couch
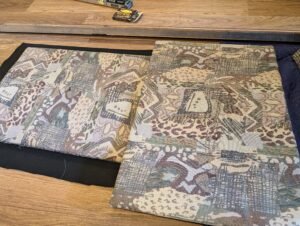
The next section was by far the most challenging with the couch. Our RV couch seems to be “special” because it does not have individual cushions, meaning everything is sewn together in one piece directly to the frame. This created a major challenge because we could not use the simple wrap it and staple to the back method. What we had to do was get narrow wood shims and drill them to the metal frame on the back of the couch. After this tedious task was completed we had to try wrapping the entire couch seat at once. This was very challenging as the surface was not flat and much larger than any cabinets we did earlier. After this we repeated the same thing for back rest followed by the kickboard and side panels. The couch now looks amazing and completely different from the original. We went with a soft blue-teal colored fabric to liven up the space! Altogether this process took 4 hours to do just do the couch.


Booth Cushions
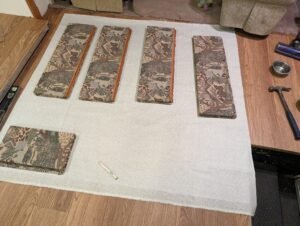
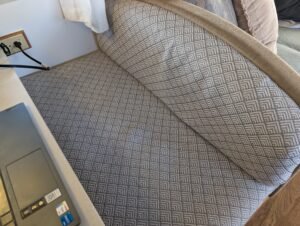
The booth cushions were the same pattern as both the couch and cabinets. We picked out a patterned white a gray fabric to break up the solid colors from other pieces we reupholstered earlier. The challenge with these cushions was that they were all cushion with no solid material to staple to. We thought about having custom seat covers made but found out this would cost more than we wanted to spend. So instead we did it our own way. It started with another run to the store where we bought 1/8″ thick wood panels. We then cut the wood panel to the same shape as the cushions with a 2″ gap so it does not poke out the edge of the fabric. We used spray glue to attach the wood panel to the cushion and then used the wrap method and stapled our new fabric and created brand new booth cushions! This process took roughly 3 hours and we love the results.

Upholstery Cost and Time
Something to keep in mind is we traveled to multiple stores to find our desired fabric over multiple weeks. We also did each project over separate weekends so this was not a constant project we started and finished in one weekend. The overall time needed for this process took over 10 hours with all of the errands and work needed for it. While time consuming and tedious, it saved us thousands of dollars.
An option we looked at originally was having everything done professionally. This would have been much easier for us to do but would have cost over $500 for labor for the couch only. We decided this was too much and could do it ourselves. With our workaround methods and materials, this whole process only cost us $275 which came in way under our expected price. The reupholstery of our furniture was one area where we saved money and were equally thrilled with the result! Definitely recommend doing this yourself if you have the option.


