Preparing Your RV for Painting
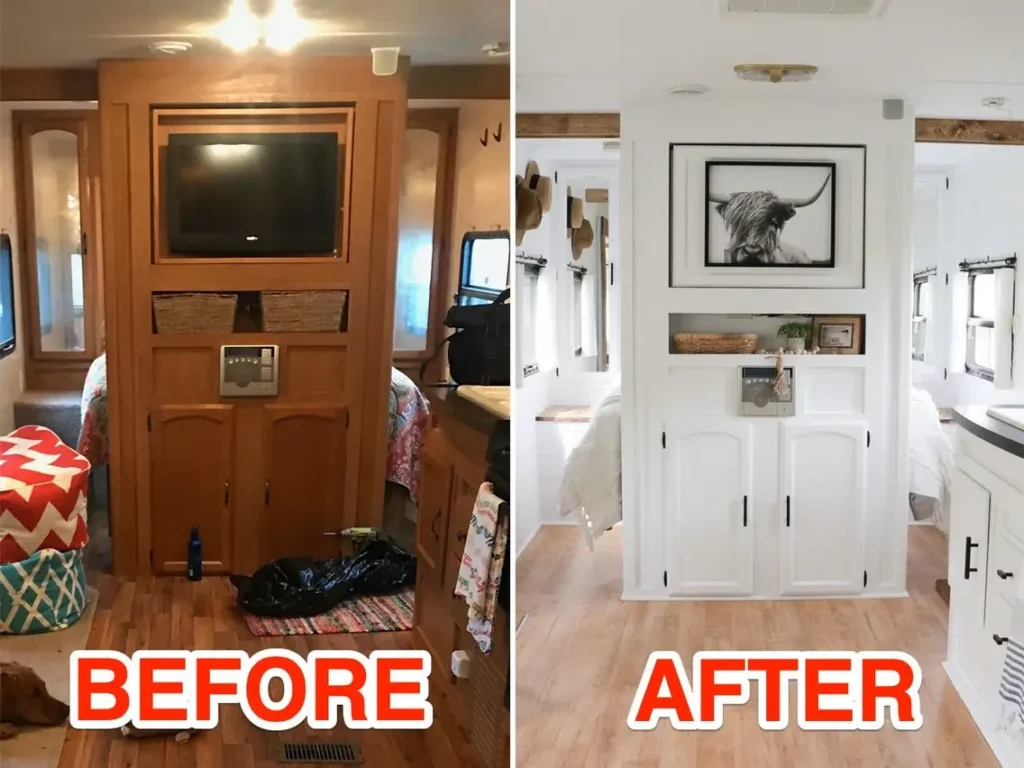
Before embarking on the journey of repainting the interior walls of your RV, it is imperative to prepare the surfaces to ensure a professional and long-lasting finish. The preparation phase is just as important to repaint RV walls as the painting because it sets the foundation for the paint to adhere properly and look its best.
Firstly, thoroughly clean the walls to remove any dirt, grease, or residues from old wallpaper or paint. This step is essential as any contaminants left on the walls can interfere with the paint’s ability to adhere and can lead to peeling or bubbling over time. Use a mild detergent mixed with water and a sponge or cloth to scrub the walls, then rinse with clean water and allow them to dry completely. There are dirt and grease removers available, otherwise a mix of soap and water will do the trick.
- This item is a KRUD KUTTER KK32 Original Concentrated Cleaner/Degreaser, 32-Ounce
- Purpose of use for Building Materials & Ladders, tile-cleaners
- This product is manufactured in United States

Next, sand the walls to create a smooth surface for the new paint. Using fine-grit sandpaper, lightly sand the entire surface of the walls to remove any gloss from previous paint and to smooth out any imperfections. This will help the new paint to bond better with the wall surface. After sanding, wipe down the walls with a damp cloth to remove any dust and debris.
Then fill all of the holes and cracks in the walls. Use a high-quality filler to patch any holes or cracks, and sand the patched areas smooth once the filler has dried. This will ensure a seamless finish once the paint is applied. If the walls are wooden a wood putty will work great hear. Scoop a small amount of the wood putty on your finger and smear it over the hole or crack. After it dries in an hour quickly run over the patch with sandpaper.
Before you start painting, tape off areas that you do not want to paint, such as windows, doors, and trim. Use painter’s tape to cover these areas to protect them from accidental paint splatters and to achieve clean, sharp edges.
Lastly, take necessary safety measures to protect yourself during the painting process. Ensure proper ventilation by opening windows and using fans to circulate air. Additionally, use protective gear such as masks and gloves to protect yourself from paint fumes and chemicals. By following these preparation steps, you will be well on your way to achieving a beautiful and durable finish for your RV’s interior walls.
Choosing the Right Tools and Materials to Repaint RV Walls
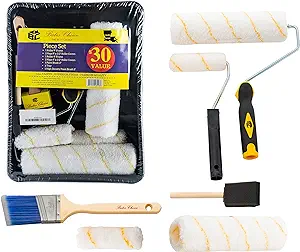
When embarking on the project of repainting your RV’s interior walls, selecting the appropriate tools and materials is important to achieving a professional and long-lasting finish. Assembling the right tools will make the process smoother and more efficient. These include paint rollers and brushes, which ensure even coverage and precision. Painter’s tape for protecting edges and creating clean lines, while drop cloths safeguard your RV’s floors and furnishings from accidental paint splatters. Additionally, having sandpaper on hand for preparing the surfaces, ensuring that the paint adheres properly.
Paint Brand and Styles
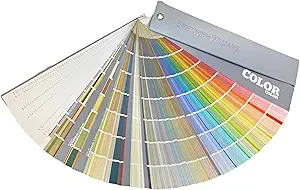
Selecting the right paint is equally important. For RV walls, it is recommended to use paints that are durable, easy to clean, and resistant to mildew and moisture. Brands such as Behr, Sherwin-Williams, and Benjamin Moore offer high-quality options suited for this purpose. Opting for a high-quality, low-VOC (volatile organic compounds) paint will not only provide a safer environment but also ensure a more durable finish. Low-VOC paints release fewer harmful chemicals into the air, making them a healthier choice for enclosed spaces such as an RV.
Applying a primer before painting helps to seal the surface, providing a uniform base and enhancing the paint’s adhesion. This step is particularly important in an RV, where surfaces may have varying textures and previous coatings. Matching the primer brand to the paint brand is recommended as they are made to work best together.
Choosing the right paint finish can significantly impact both the appearance and functionality of your RV’s interior. Matte finishes offer a non-reflective surface that hides imperfections but may be less resistant to cleaning. Satin finishes strike a balance between aesthetic appeal and ease of maintenance, providing a slight sheen that is easier to clean than matte. Gloss finishes, on the other hand, are highly durable and easy to clean, making them ideal for high-traffic areas, though they can highlight surface imperfections and be shiny in sunlight.
Step-by-Step Process to Repaint RV Walls
Repainting the interior walls of your RV is a process that requires attention to detail and patience. The first step is applying a primer coat. Primer is essential as it ensures the paint adheres properly to the walls, providing a solid base that enhances the longevity and vibrancy of the final coat. When selecting a primer, opt for one that is compatible with the type of paint you plan to use.
Begin by “cutting in” around the edges with a brush. This technique involves painting the corners, edges, and areas around fixtures with a brush before using a roller for broader surfaces. Cutting in helps create a clean edge and makes it easier to blend the edges with the rest of the wall. Use a high-quality brush to minimize brush strokes and achieve a smooth finish.
Once the edges are complete, use a roller to cover the larger areas. Pour the paint into a tray and load the roller by rolling it in the tray until it is evenly coated but not dripping. Apply the paint using consistent pressure and even strokes to avoid streaks and uneven patches. Start from the top of the wall and work your way down in sections, overlapping each stroke slightly to ensure full coverage.
For a professional-looking finish, multiple coats of paint are often necessary. After applying the first coat, allow sufficient drying time as specified by the paint manufacturer, typically 12 – 24 hours. Once dry, lightly sand the surface with fine-grit sandpaper to remove any imperfections and improve adhesion for the next coat. Wipe away any dust before applying subsequent coats. Repeat this process until you achieve the desired opacity and smoothness.
Tricky areas such as corners and around fixtures require extra care. Use a small brush to paint these areas, ensuring that the paint is applied evenly. Maintain steady hand movements to avoid drips and runs. If painting around removable fixtures, consider removing them for a cleaner finish, then reinstall them once the paint is dry.
By following these detailed steps, you can ensure a smooth and even finish that enhances the appearance of your RV’s interior walls. With the right techniques and patience, repainting your RV can be a rewarding DIY project.
Time Estimates and Final Touches
Repainting the interior walls of your RV is a task that requires careful planning and realistic time management. Starting with preparation, you should allocate approximately one to two days for thorough cleaning, sanding, and masking. This stage is crucial for ensuring a smooth and professional finish. Applying primer can take about half a day, with quick-dry primers reducing waiting time significantly. Depending on the size of your RV, the actual painting process may take anywhere from one to two days per coat. If multiple coats are necessary, factor in additional time for drying between applications, generally around 24 hours per coat under optimal conditions.
Several factors can affect these time estimates. The size of your RV is a primary consideration; larger RVs naturally require more time. The type of paint and primer used also plays a role; quick-dry options can expedite the process. Environmental conditions, such as humidity and temperature, can influence drying times. To speed up the process without compromising quality, consider using fans or dehumidifiers to create ideal drying conditions.
Once the painting is complete, final touch-ups and clean-up are essential for a polished look. Carefully remove painter’s tape while the paint is still slightly tacky to avoid peeling. Clean brushes and rollers immediately after use to maintain their effectiveness and longevity. Proper disposal of waste materials, such as empty paint cans and used painter’s tape, is important for environmental responsibility.
Adding decorative elements or accent walls can enhance the interior aesthetics of your RV. Consider using stencils or painter’s tape to create geometric patterns or murals. Accent walls, painted in a contrasting color, can provide a focal point and add depth to the space. These final touches can transform your RV’s interior, making it a personalized and inviting environment.
Some of the links on this site are affiliate links. This means that if you click on the link and purchase the item, I may receive an affiliate commission at no extra cost to you. I only recommend products or services I use personally and believe will add value to my readers. Thank you for your support!


